To add a new photo or replace an existing one, follow these steps:
Activate Edit Mode:
Navigate to the page where you wish to add or adjust the image. In the purple bar at the top, click on "Return to edit" to switch to edit mode. This will display section guides on the page. Hover over a content block to see the edit button appear on the right.
Choose a Method to Add an Image
New Empty Block: Add a new empty block, insert an image, and configure the settings.
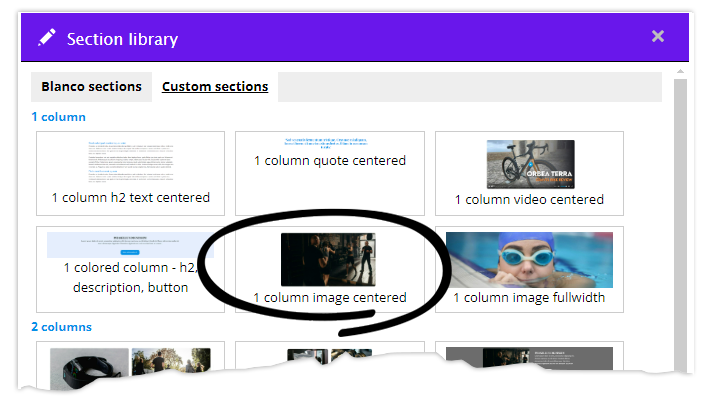
Section Library: Use the Section Library for a quicker setup. Select a pre-configured section that includes an image. These settings are preset but can be adjusted. Replace the image as needed.
Layout options: Choose from various layouts in the library, such as sections with the image centered, full-width images, or multiple columns with images for a sequential display side by side.
1. Add empty image block
In the column of a section, click + Add block > Choose Image. No section on the page yet? Add a section first
In the opened edit screen, click the purple Add media
The Media manager will open, you can choose an existing image from the media manager or upload a new image.
2. Add image via the Section library
In the middle of the page, click on Import section from library > Open the Custom sections tab > Choose e.g. 1 column image centered.
The section with the image is now inserted into the page. You can now adjust the image as described in Replace Image
Replacing an image
To replace an image on a page with existing content or within a section from the Section Library, follow these steps:
Ensure Edit Mode:
Confirm the page is in edit mode.
Access Image Settings:
Click on the edit icon and then select Edit to access the image settings.
Change the Image:
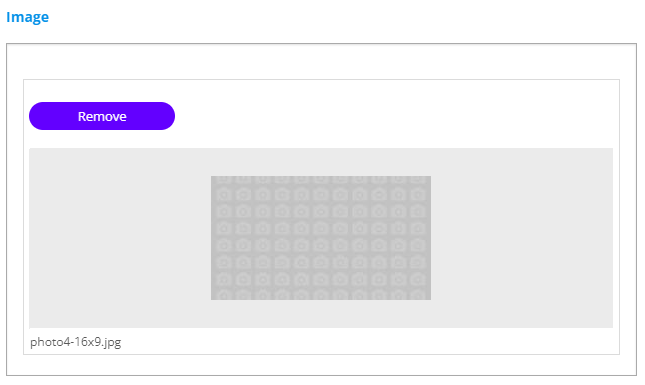
In the edit screen, click the purple Remove button to delete the current image.
Then, click Add Media to open the Media Manager.
Select or Upload Image:
In the Media Manager, choose an existing image from the library or upload a new image to replace the old one.
Upload an image to the Media Manager
To upload and configure an image in the Media Manager, follow these steps:
Upload Image:
Click the Add Filebutton at the top of the Media Manager.
Browse to the image file on your computer and select it to upload.
Note that you can upload one file at a time, with a maximum size of 12 MB. Accepted file types are PNG, GIF, JPG, and JPEG.
Optimize Image:
The file format will be optimized during the upload to ensure it is suitable for online use and the image size remains manageable on web pages.
Set Focal Point (Optional):
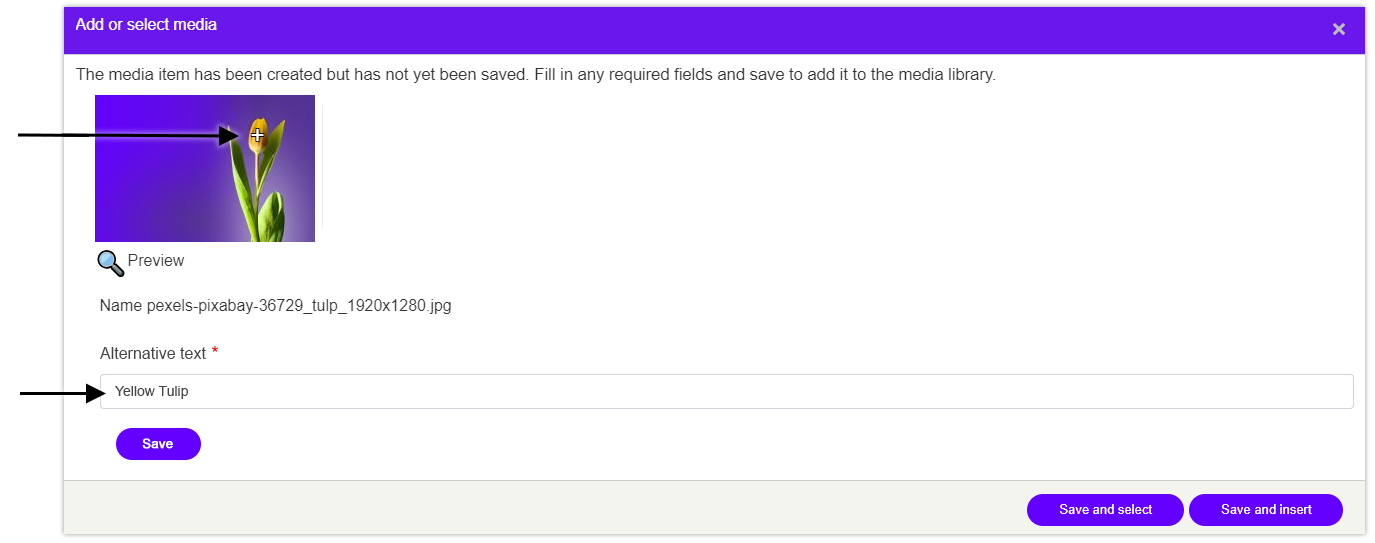
Set the focal point by moving the white cross to the center of the subject in the photo. This ensures that the focal point remains centered in different display sizes.
To adjust the focal point later, navigate to My Magzmaker > Manage > Media Manager and click on the edit icon to reopen the settings screen.
Enter Alt Text (Required):
Provide alternative text (alt-text) for the image, describing what is shown. This is crucial for SEO as it gives search engines clear information about the content of the image.
The alt text can also be displayed as a caption in photo albums. Adjust this in the settings of the relevant content block.
Adjust Alt Text Later:
If needed, you can update the alt text by going to My Magzmaker > Manage > Media Manager and clicking on the settings icon to access the edit screen.
These steps ensure that your images are not only well-managed within the Media Manager but are also optimized for both search engines and visual presentation.
Adjusting image ratio
After uploading and inserting a photo, you have the option to adjust its aspect ratio:
Open the Edit Screen:
Navigate to the edit screen of the image block.
Select Aspect Ratio:
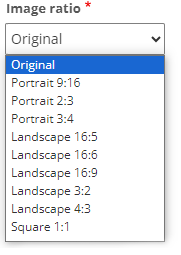
Use the Aspect Ratio dropdown to choose a new ratio, transforming an original portrait photo into a landscape orientation or vice versa.
Maintain Focal Point:
The previously set focal point will remain centered, ensuring the main subject is highlighted regardless of the new ratio.
In the example on the right, the tulip is positioned all the way to the right in the original. With the focal point in the center, the subject would be partially cut off in some aspect ratios. However, if the focal point is moved to the yellow bud of the tulip during the upload, this part will be kept as the center in every aspect ratio. See the images below.
Example of focal point for different aspect ratios
When using the standard templates, an aspect ratio is always set so that the layout of the page is preserved, but you can always change the aspect ratio to your liking.
Adjusting Block Settings
When you're in the edit screen, you can modify the block's general settings across four tabs: Content, Settings, Animation, and Advanced. Detailed descriptions of these settings are available on the Edit-page.
Image Block Specific Settings:
Caption: Add a caption in the Image title field under the "Caption" heading.
Text Alignment: Position the caption to the left, right, or center below the image.
Size and Positioning on the Page:
Learn various methods to set the size and position of an image on your page on the Size and position page:
Utilize the column layout of a section to define the image's size and positioning.
For an image within a 100% width section, adjust its size and position using left and right margins.
Free stock photos
Still looking for suitable images? Check out these sites for free stock photos: