With Magzmaker, you can create all types of publications: magazines, whitepapers, annual reports, brochures, presentations, etc.
In Magzmaker, each publication is referred to as an edition.
An edition is structured linearly, consisting of consecutive pages from the cover to the last page. This differs from the typical tree structure of a website.
Here's a breakdown of the components within an edition:
Page: Each page within an edition can be divided into sections.
Section: A section can split a part of the page into 1 to 6 columns, depending on the layout needs.
Column: Each column within a section can host various content blocks.
Types of Content Blocks:
Image: A block dedicated to displaying a single image.
Text Block: A block for textual content.
Button: A clickable button, often used for calls to action.
Video: A block that embeds a video.
Masonry Block: A photo overview arranged in a masonry layout with tiles positioned in offset rows.
Slick Slider Block: A block displaying a rotating carousel of photos placed side by side.
This structure allows for a flexible yet organized way to present content within each edition.
2Create an edition
The first step is to create an edition:
Log in to your Magzmaker account ("URL-account.ext/user") with your username and password.
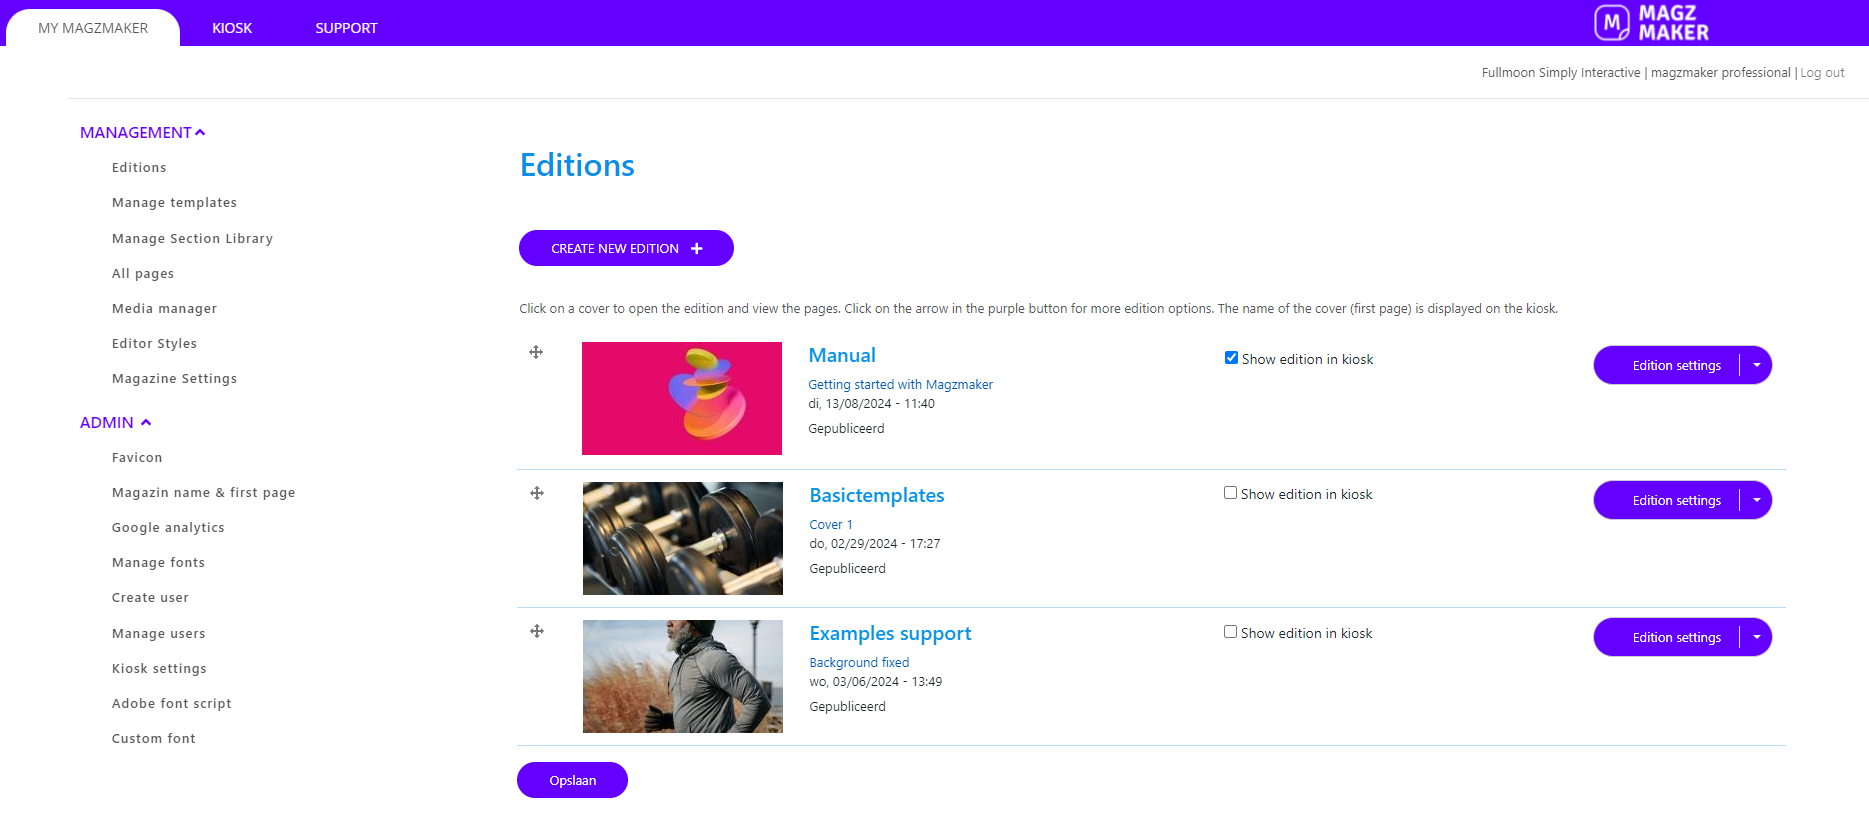
You are now in the Magzmaker dashboard with an overview of the various functions within your account on the left and an overview of your editions on the right..
Afbeelding
The Magzmaker Dashboard
If you have not yet created any editions, there is one edition available with sample pages. The sample pages are also available as a template that you can use to quickly create pages yourself.
Click on 'CREATE NEW EDITION' to create a new empty edition.
Give your edition a name and click on Save
3 Create and setup a page
A. Create a page
Create a first page within the edition you just created:
Click on "Create new page".
Under My Templates, choose one of the basic templates, for example 'Headerphoto small' (or choose Blank Template and build a page yourself with sections and content blocks; in this Quick Start we assume a page based on the template 'Headerphoto small').
Give the page a name and click on Save.
B. Edit / set up a page
After you have saved your created page, you will see it in edit mode; click on 'Preview' (in the purple bar) to see how your reader sees the page. Then click on 'Back to Edit' again to return to Edit mode.
With some templates, for example the template Cover1, the page has a background photo. You set this in 'Page Settings' in the purple bar. Click on this. In the page settings you will see successively:
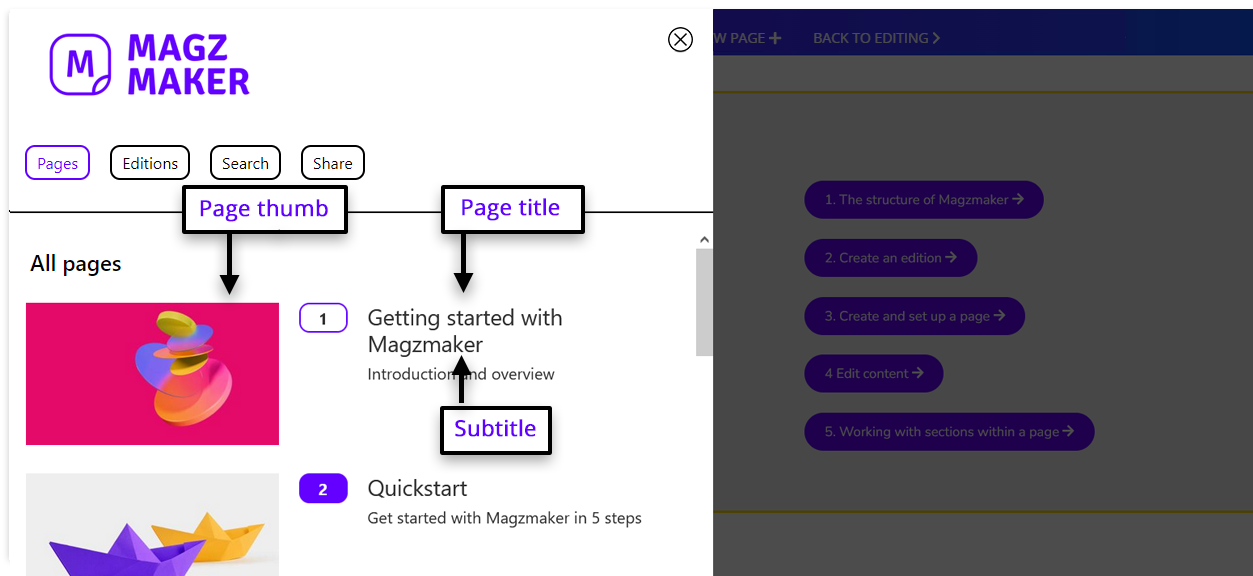
Page title: this is the page name you have already provided. Below that, the subtitle. This appears in the page overview of the overlay menu (which opens via the menu button at the bottom left of the page) under the title. Adjust this as needed.
Page thumbnail: the image used in the page overview in the overlay menu. Adjust this as needed.
Afbeelding
The background settings::
You can add a background image (or video) via the media manager. The default settings are often good, but depending of the position of the objects on the image, you can change the settings:
Settings for the size and position of the background image
The way the image is displayed on desktop and on smaller screens (responsive)
The meta description of the page that is also used by search engines.
NB. By adding a meta description to your page, you improve the search results of your page.
C. Creating and managing templates
If you have created or modified a page that you want to reuse, click on the 'Page Options' button of that page (in the purple bar) and select 'Create a Template'.
You can also copy a page for reuse within the same edition.
You can manage your templates in the Template library:
Click on 'Edit Edition' on the page (in the purple bar) and subsequently in the side menu (left side) on 'Manage Templates'.
To adjust the properties of the template (template name and any assigned tags), click on the pencil next to the template in the overview.
Delete a template by clicking on the X
4 EDIT Content
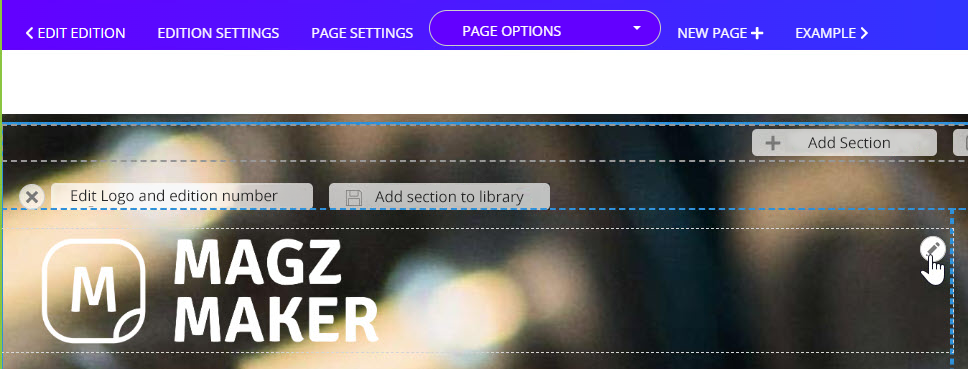
If you want to edit a content block, go over it in edit mode with your mouse and click on the pencil at the top right of the block.
For example, in Cover1, click on the pencil in content block logo.
Afbeelding
Adjust the logo by first removing the Magzmaker logo and selecting your own logo in the Media Manager.
Via 'aspect ratio' you can select a different size of the image or you can use the original ratio of the image.
Via 'Image title' you can place a caption with the image (the logo).
You can keep the default settings, but you have the option to customize the logo display. Adjustments can be made to the alignment, padding (distance from the edge of the block), margins (distance from the edge of the section), and the element's width. Additionally, you can set the block's background color, transparency, and apply an animation. Advanced settings are also available for further customization.
Then click on the pencil to the right of the header text in Cover1
Now, you can modify the text. When editing by line, the existing styles will be preserved.
Alternatively, use the menu bar buttons in the editor to adjust styles. Select 'Format' to apply headings, and 'Style' to change text attributes like color or add effects like text shadow.
Similar to the logo, you can also customize the appearance of a text block.
5Working with sections within a page
All content blocks are placed within a section. A section is a part of the page that is divided into a number of columns.
A. Adding content blocks to a section
In each column of a section you will see a '+' with the text 'Add block'. If there are already content blocks in a section, the '+' is below. Click on this and you can choose from the available types of content blocks: Image, Button, Masonry block, Slick slider, Text block and Video.
Set the content in the same way as above under 'Edit content'.
B. Adding a section to a page
With the Magzmaker Publisher subscription you can add sections (empty and filled with sample content) from the section library to your pages. With the Magzmaker Professional subscription you can also create and add sections to your library yourself.
Magzmaker Professional subscription: Under each section there is a button '+ Add section' and a button 'Insert section from library'
Magzmaker Publisher subscription: Under each section there is a button 'Insert section from library'
'Insert section from library': You can add a predefined section from the library. This can be an empty section (Blank sections) with only a specific column layout in which you add content blocks yourself. Or you can choose a formatted section with image and text from the example pages (Custom sections), you can change the content in these sections, the layout is retained. This way you can quickly build a page.
'+ Add section': add a blank section, and choose a layout in 1 to 6 columns
In the window that now appears you can give the section a name and set the size of the columns at the bottom.
Note: The total of relative widths must always equal 12. For instance, in a 3-column layout, the default distribution is 4-4-4 (totaling 12). You can modify this to 2-4-6 or any other ratio, as long as the sum remains 12.
C. Edit Section
Above each section is a label with the name of the section.